Heirloom Meals: Savoring Yesterday's Traditions Today

Sunday February 14, 2010

Ms Murky Mondays:
Heirloom Flourless Chocolate Cake for Valentine’s Day

Today is Valentine's Day and I am one that loves homemade gifts from the heart.  My sweetheart, Jim, has Celiacs Disease, which is an autoimmune disease triggered by eating wheat or foods with gluten.  So in keeping with all the buzz about the aphrodisiac effect of chocolate, I decided a flourless (hence, no gluten) chocolate cake would be my gift.


This Recipe is from my amazing friend, Deb Mackey's family archives with her note as follows:


"Here’s an absolutely FAB recipe for a flourless chocolate cake that is to die for, and can be très elegante, depending on how you gussy it up. I frequently plate it on a swirl of raspberry coulee for especially discerning friends.
 
Every one I’ve ever made it for has raved, and it became the birthday cake of choice for every man in my life. And for some of their subsequent wives’ too, I might add.
 
I know Jim will enjoy it."

Jackie Burnham’s Flourless Chocolate Cake
 
350 oven
10” springform pan, greased (or wax/parchment paper will do)
 
1 12 oz. Semi-sweet chocolate chips
½ c. unsalted butter
6 eggs – separated, room temperature
1 c. sugar
½ c chopped pecans
1 Tbs. Bailey’s Irish Cream
½ tsp. vanilla
1 pinch cream of tartar
 
Topping
2 c. whipping cream
¼ c. powdered sugar
2 Tbls. Bailey’s Irish Cream
2 oz. chocolate curls
 
1.  Melt chips, with butter, over hot water
2.  Beat yolks in large bowl ( 5 mins., or until thick)
3.  Beat in ½ c. sugar, 1 Tbls. at a time
4.  Stir in chocolate, pecans, vanilla and Bailey’s
5.  Beat whites with cream of tartar to soft peak
6.  Gradually add remaining ½.c. remaining sugar. Beat stiff, not dry
7.  Fold ¼ of whites into the chocolate cake mix
8.  Fold the mix into the remaining whites
9. Pour into pan and bake 30 minutes @ 350 d.
10.  Reduce oven to 275. Continue to bake 30 minutes
11.  Turn off oven. Let cake stand in oven with door slightly ajar. About 30 minutes
12.  Remove from oven. Dampen towel and place on top of cake for 5 minutes. Remove
13. Top of cake will crack and fall. Cool cake in pan
14.  Remove springform when cool. Transfer cake to platter
15. Beat cream to soft peak
16. Beat in powdered sugar and remaining Bailey’s. Spoon over top of cake and smooth
17. Sprinkle with chocolate curls
19. Refrigerate 6 hours. Let stand at room temp for 30 minutes before serving 
 
I hope he does enjoy it!!  

Sunday January 24, 2010

Ms Murky Mondays:
Immersion Blenders - A Cook’s Best Friend

My friend Joanna recently told me that she wanted an immersion blender for her birthday but she didn't know which one to buy.  And as you might imagine, I immediately told her which one I purchased, and why.  But I know there are a few great models out there - so Joanna - this review is for you!!


Breville BCS500XL 9.6 Volt Cordless Immersion Blender with Recharging Base

This is the immersion blender that I use.  One of the main considerations for me was the convenience of a cordless immersion blender.  I have limited counter space near my stove where I predominantly use it.  It does the trick for me but its controls are sensitive and finicky, and sometimes stalls out.  I, of course, have figured how to outwit it but it may frustrate others.  I think if you can live with a corded model, I would get a different one.  You can buy this model at Amazon: http://www.amazon.com/Breville-BCS500XL-Cordless-Immersion-Recharging/dp/B000MDASFC


SmartStick Brushed Chrome Hand Blender 


by Cuisinart
I figure when a model is back-ordered due to overwhelming demand and the majority of the reviews are raves, AND if the price is compelling, look no further....Here are the features according to the manufacturer:


  • Powerful 200-watt motor handles more blending tasks


  •  

  • Stick design reaches into pots, pitchers and bowls to extend blending options


  •  

  • Ergonomically designed grip offers comfortable hold and more control while blending


  •  

  • Operates with a one-touch control for easy, one-handed blending


  •  
    KitchenAid® Immersion Blender
    Here are the benefits according to the manufacturer:


    • Variable speeds provide greater processing control that adjusts to handle a variety of foods, beverages and soups.
    • The premium stainless steel blending attachment reaches an 8-inch immersion depth.
    • The stainless steel splashguard covers the blending blade to prevent splattering of ingredients.
    • The stainless steel whisk maximizes air in mixtures for fluffier egg whites and whipped cream.
    • The 4-piece chopper attachment quickly chops herbs, vegetables, fruits, cooked meats, nuts and cheese.
    • 5-ft. power cord provides exceptional freedom to move around the kitchen.
    Most of the Kitchenaid reviews were extremely positive.  I think these new models have a lot going for them - the 8" immersion depth, for one.  And they have made the power cords longer if you can live without the cordless.  Some of the Kitchenaid models come in fun colors like red.  The one I would have on my wish list, if price were not a concern can be purchased at www.surlatable.com  http://www.surlatable.com/product/id/131824.do#

    Saturday December 26, 2009

    Ms Murky Mondays:
    Christmas Dinner

    Herb-crusted Rib Roast
    Mashed yellow potatoes and celeriac (from my CSA stash)
    Roasted brussel sprouts
    Broccoli sauteed with garlic and olive oil
    Turnip and Potato Gratin
    Arugula Salad with Dijon vinaigrette

    Ice cream and sherbet cake

    Had a love-filled afternoon cooking with my Mom and then sharing this wonderful meal that we were all so grateful to enjoy.  Present were my Mom and Dad, Jim (my man), Jen (my sis), Johnny (her husband), August (my bro), Sandra (his wife), AJ (my nephew). We celebrated being together and the spirit of the day. Thank you all for such a wonderful day.

    Click the photo to watch a clip of the beef waiting to go in the oven:

    Thursday December 03, 2009

    Ms Murky Mondays:
    Time Thief - How did 2+ months go by?

    Ever wonder where the time goes? My mind is still in September but my body is in early December. Somehow I managed to operate at warp speed, get new clients, do another TV segment on WNYT - Newschannel 13 out of Albany, harvest our first meat chickens, attend my high school reunion, host the family for Thanksgiving, begin a jogging program along with a core strengthening pilates program...are you tired yet?


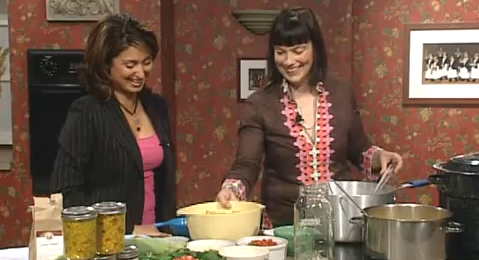
    So how do I blog on a regular basis - how do I catch you up on all the yummy meals I have made in the last 2 months? Well I'll start with sharing my TV segment - Heirloom Trick or Treats.


    Heirloom Caramel Apples
    I’ll admit it, in a pinch I make caramel apples with Kraft caramel candy!! But, I am somewhat of a purist and food snob and I take pride in using real ingredients and making things from scratch. So here is a winner that is so simple that uses 3 real ingredients.
    The only caveat is you need a candy thermometer but it’s worth having in your cooking gear arsenal!!
    6 - 8 small apples, unwaxed, cold and craft sticks
    1 cup heavy cream
    1/2 teaspoon sea salt
    1 cup honey
    Line a baking sheet with parchment or wax paper.
    Push the stick deep into each apple at the stem area.
    Fill a large bowl 1/2 full with ice water and set aside.
    In a medium, saucepan heat the cream and salt until tiny bubbles start forming where the cream touches the pan. Stir in the honey. Bring the mixture to a boil. Now reduce the heat to an active simmer and cook, stirring constantly with a wooden spoon, for about 15-20 minutes minutes or until the mixture reaches about 255-260 degrees on your candy thermometer.
    To stop the caramel from cooking, set the bottom of the saucepan in the bowl of cold water. Stir until caramel begins to thicken up. Here is where there is a little bit of “art” - the caramel has to me thin enough to coat the apples but thick enough to stick. If the caramel thickens too much simply put the pot back over the burner for 10 seconds or so to heat it up a bit.
    Tilt the sauce pan so all the caramel forms a pool on one side, then dunk and twirl each apple until it is thoroughly coated with caramel. Place each apple on the baking sheets and allow the caramel to cool and set. Enjoy!!
     
     
    Caramel Apples using caramel candies
     
    5 medium apples, washed, well dried
    1 bag (11 oz.) KRAFT Caramel Bits
    2 Tbsp. water
     
    Insert one wooden pop stick (from bag of caramels) into stem end of each apple. Cover a baking sheet with waxed paper; spray with cooking spray. Set aside.
     
    Place caramel bits in medium saucepan. Add water; cook on medium-low heat 3 min. or until caramel bits are completely melted, stirring constantly.
     
    Dip apples into melted caramel until evenly coated, spooning caramel over apples if necessary. Allow excess caramel to drip off. Scrape bottoms of apples; place on prepared baking sheet. Refrigerate at least 1 hour. Remove from refrigerator 15 min. before serving. Store any leftover apples in refrigerator.
     
    Caramel apples can be rolled in a variety of coatings for a sweet treat that is perfect for gift-giving or for serving on a special occasion, i.e: nuts, mini chocolate chips,
    drizzled chocolate, drizzled white chocolate.


    Cobweb Cupcake Icing
     
    2 egg whites
    21/2 to 3 cups confectioners' sugar
    1 teaspoon pure vanilla extract
    2 tablespoons fresh orange juice
    Black or dark brown food coloring
    Make whatever kind of cupcakes you like - from scratch or mix.
    To make the icing, place the egg whites in a bowl. Using an electric mixer set on high speed, beat until soft peaks form. Add the confectioners' sugar, vanilla, and orange juice and continue to beat until thick and shiny. If too thick, add more orange juice. If too thin, add more confectioners' sugar.
    Transfer 1/3 of the icing to a small bowl and color with black or dark brown food coloring. Spoon this dark icing into a pastry bag fitted with a tip, or pour it into a plastic squeeze bottle.
    Now, ice the cupcakes and make the cobwebs: Spoon the white icing into the center of the cupcake and spread with a small spatula or butter knife. Starting at the center of a cupcake, pipe a spiral of the dark icing from the center to the outer edge. Then, drag a sharp knife point from the center of the spiral to the edge of the cupcake. Wipe the knife clean, move about a 1/2-inch to the left or right and drag the knife in the opposite direction from the outer edge to the middle of the cupcake. Continue in this way until you have worked your way around the cupcake and formed the cobweb. Repeat with the remaining cupcakes.


    Chocolate Covered Pretzels
     
    2 bags chocolate chips (dark or milk chocolate)
    1 bag pretzels logs
    Chopped nuts, for garnish, optional
    Colored nonpareils, for garnish, optional
    Sprinkles, for garnish, optional
    Coconut, for garnish, optional
    Melt chocolate in double boiler over medium heat on stove top. Using tongs, or your fingers, quickly dip pretzels in chocolate allowing the excess to run off. Place dipped pretzels on waxed paper lined cookie sheets. Sprinkle with chopped nuts, colored sugars or other toppings. Allow to harden. You may need to refrigerate for a while to help this along. Once hardened, remove from sheets and store in a cool location, with waxed paper between layers.
    Tip: Package pretzels in clear cellophane bags or in vase for festive gift giving!
    [youtube=http://www.youtube.com/watch?v=tiwbZb6_phk]

    Sunday September 20, 2009

    Ms Murky Mondays:
    Canning Workshop - Many Hands Make for Light Work


    In the photo from left to right: Me, Jim Finnerty, Judith Lerner, Jacque Metsma, Carol Way, Kevin Charlton, Doreen, Sandy, DonaSenecal, Margot and Serene Mastrianni.

     
    My grandmother's wisdom was evident on Thursday night (the 17th) when I hosted a canning workshop for Berkshire Grown's "Preserving the Bounty" month when 10 people diligently chopped, diced or minced 20 lbs of tomatoes, 5 lbs of onions, 10 green peppers, 20 jalapenos, 20 cloves of garlic and 2 dozen ears of corn in 30-40 minutes. If I had taken on the task by myself, which I frequently do, it would have been hours.
    Anyhow, what fun we had! And the result was 40 pints of corn and black bean salsa. Here's the recipe for about 1/5 of what made:
     

    Corn and Black Bean Salsa


    4 lbs tomatoes, chopped and drained

    2 1/2 cups onions, chopped

    1 1/2 cups green peppers

    1 cup jalapeno pepper, chopped

    6 garlic cloves, minced

    1 teaspoon cumin

    1 teaspoon black pepper

    1/8 cup canning salt

    1/3 cup vinegar

    1 (15 ounce) tomato sauce

    1 (12 ounce) tomato paste

    1 (15 ounce) black beans, drained and rinsed

    2 cups fresh corn kernels


    Equipment: boiling water canner,canning jars, canning funnel, rubber spatula, jar lifter and/or tongs


    First, prepare your jars as follows:


    Place cans on rack of boiling water canner, add water until the pint jars are about 2/3rds full. Cover and bring to a simmer. This process kills any bacteria. In a small saucepan, place the lids - the flat, round piece, cover and bring to a simmer. The screw bands do not need to sterilized.


    Then, start your vegetables:


    In a large saucepan, combine all ingredients and bring to a boil, stirring occassinally for about 5 minutes.


    Now you are ready to start canning your salsa:


    One jar at a time, remove from canner, pouring hot water back into canner, place jar on flat heat-resistant surface. Ladle salsa into jar leaving about a half inch of headspace, wipe the rim and threads with a paper towel. ( This is important to make sure vacuum seal can occur). Lift a hot lid with your tongs and place on jar and then screw the lid with your fingertips until tight. Place back in canner with tongs. Repeat until done.


    Cover all jars with additional water by an inch or so. Cover canner and bring to a boil. The boiling must be continuous and rapid for 15 minutes. Remove lid, let sit for about 5 minutes or so. Remove jars without tilting, place jars on a towel in a draft-free spot and allow to cool for 24 hours. Store in a cool dark place for up to a year.


    This recipe will yield about 6 pint jars. Enjoy!!

    Tuesday September 15, 2009

    Ms Murky Mondays:
    Here’s my Corn Relish News Clip

    I had a ton of fun preparing and then being on a news segment on Channel 13 in Albany, NY.
    What was quite interesting was that when I arrived in the studio at 7.30 in the morning lugging all my props - pots, ramekins, all stages of corn relish, I was actually expecting to get some guidance. They pointed me to the studio kitchen, and told me to go ahead and get set up.
    So I diligently got everything staged, styled and ready. I had marked each of my ramekins with masking tape and the amount of the ingredients so if I got "stage fright" I would be able to sail through without a hitch. But I kept waiting for the producer or someone to come over and tell me what they would like to cover, how much time we had etc. So I stood there with all my nervous energy, waiting and wondering when it would be my turn.
    And then, someone came over and gave me the microphone. I thought, "Ok, next someone will give me a little coaching." Then the bright lights were pointed at me, the camera rolled over and there was a commercial break. The news anchor came over, asked me how to pronounce my name and a little about Preserving the Bounty and 4,3,2,1..."Welcome back to....we've got Carole Murko in the studio with us today - tell us what do you plan on showing us"...and I was off ...winging it, having fun, answering questions, trying to do a food demo... and in what felt like 10 seconds it was over...."but wait, I'm not done!" I am thinking....
    So, click the photo to watch the clip - it was actually more like 4 minutes, not 10 seconds and I loved every minute of it. Hope they ask me back to do more!!

    Page 13 of 14 pages ‹ First  < 11 12 13 14 >