Sunday May 09, 2010
Heirloom Manicotti
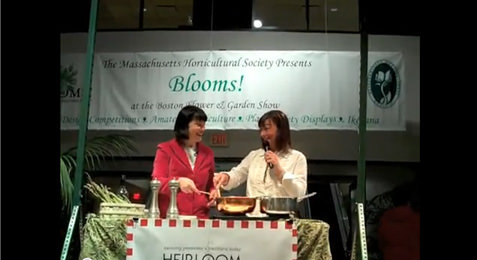
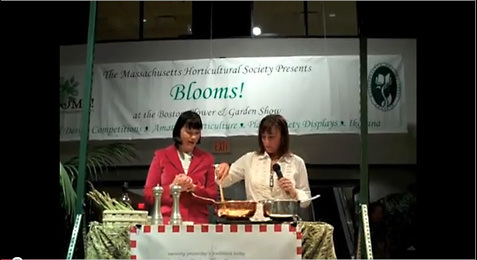
When I think of Mother’s Day there is a recipe that comes to mind that has been handed down from my great grandmother to my grandmother to my mother to me. This is the essence of heirloom meals - savoring yesterday’s traditions today.
My featured recipe is manicotti and for all of you who speak phonetically, M-A-N-I-C-O-T-T-I. When I was little I pronounced it manicotti (pronounced in Italian) and most of my friends had a quizzical look on their faces – So I have gotten into the habit of saying it two times – like Tony Two times form the God Father. Manicotti (MANICOTTI) – get it!! I am sure most of you have had manicotti –thinking large tubular noodle stuffed with ricotta (pronounced Italian style) R-I-C-O-T-T-A – there’s Tony Two times again!!
Well my family recipe will transform your idea of manicotti forever!! This is our recipe for heavenly light crepes - fill them with luscious ricotta filling and finish with some sauce - the best!!
Manicotti Crepe Recipe:
This recipe makes 80 crepes but can easily be halved or quartered. This dish is such a family favorite we usually make all 80 and freeze some for another time.
12 large eggs
4 cups of flour
4 cups of water
8 Tablespoons of melted butter (cooled)
Beat eggs, flour and water until smooth, then add the melted butter. Cover batter and refrigerate overnight.
I happen to be lucky enough to have my grandmother’s well-seasoned caste iron crepe pan, but a non stick crepe pan will do as well. Using a well-seasoned crepe pan or non-stick 5-6" frying pan, heat on low-medium flame, brush pan with canola oil or melted butter. (I usually do a tester before I really get started to make sure pan it hot enough etc.) Then ladle the batter into the pan and swirl it so it spreads into the entire surface. Cook until the edges start browning and top seems dry. I use a fork but a spatula would do the trick as well to loosen the edges. Then flip the crepe and let it cook for a few seconds. (I find this is a feel sort-of-thing - you just can tell when it's ready!!) You can make these up to three days ahead.
Ricotta Filling
6 lbs Ricotta
4 eggs
2 lbs mozzarella, cubed
Romano cheese, salt, pepper and parsley to taste
Milk (to adjust the consistency)
Mix all ingredients except milk. We want it to be thick, not runny.
Assembly
And now the assembly…oops….what about the sauce??? Truly you can use any sauce – your own, a jar of Rao’s Homemade. We are biased, we use our own. Our secret for this particular dish are making tiny meatballs!! Our sauce and meatball recipe will have to be another show.
Take a crepe and spread ricotta mixture in center, fold one edge over the other and place in baking dish that has some sauce spread lightly over bottom. Repeat. We recommend only one layer as it is easier to serve.
Bake at 350 degrees for 20-30 minutes. And remember they must settle for at least ten minutes before serving or you will have a runny mess - still delicious but not pretty!!
Enjoy!!
Monday March 29, 2010
Part 2 of the Asparagus Risotto demo. Click the photo to watch the show.

Sunday March 28, 2010
Part 1 of the Asparagus Risotto Demo. Click the photo to watch the show.

Sunday March 28, 2010
Early Spring Asparagus Risotto
Risotto is one of the simplest and versatile of dishes. And while I provide this recipe as a guide, keep in mind you can make risotto without the white wine, with just onions if you don’t have shallots, with just butter, just olive oil and with many different “add-ins.” To celebrate spring, however, nothing beats the great asparagus.
1 bunch asparagus, cut into 1 inch pieces
4 cups water
2-2 1/2 T of butter or olive oil (I use both, 1 T butter, 1+ T of olive oil)
1/2 - 3/4 cups of a mix of shallots and onions, chopped
(I used 2 shallots and one small onion)
2 cups of Arborio Rice
1/2 cup white wine
4 cups chicken stock
3-4 cups of the asparagus water
1 cup parmesan cheese
Salt and Pepper to taste
Clean and cut the asparagus into 1 inch pieces. I like to cut them on the diagonal. Blanch the asparagus for a minute or so and remove from water. Keeping the warm water to add to the risotto. Heat the chicken stock and asparagus water to a near boil and keep warm.
Heat your butter and oil in a large saucepan or risotto pot. When butter is melted, add your chopped shallots and onions. Saute for 2-4 minutes until translucent. Then add your arborio rice and stir to coat thoroughly with your butter and oil and then continue to saute for another minute or so. Add your white wine and stir until it is completely absorbed. Next we begin the process that makes risotto creamy. Add a ladle of your hot chicken broth and stir constantly until is is absorbed. Repeat until you have used all your broth and most, if not all, of your asparagus water. And when your rice is tender but not mushy. At this time, remove from heat, add asparagus, then add parmesan cheese, salt and pepper to taste and serve immediately.
Makes 4 generous dinner servings or 6 side servings.
Some fun facts about asparagus:
- Asparagus is a member of the Lily family.
-
Asparagus spears grow from a crown that is planted about a foot deep in sandy soils.
-
Under ideal conditions, an asparagus spear can grow 10" in a 24-hour period.
-
Each crown will send spears up for about 6-7 weeks during the spring and early summer.
-
The outdoor temperature determines how much time will be between each picking...early in the season, there may be 4-5 days between pickings and as the days and nights get warmer, a particular field may have to be picked every 24 hours.
-
After harvesting is done the spears grow into ferns, which produce red berries and the food and nutrients necessary for a healthy and productive crop the next season.
Source: Michigan Asparagus Advisory Board
Sunday February 21, 2010
This is one of the dishes my Mom spoke about on Heirloom Meals Radio. Made with the simplest ingredients, this dish provides an ample dose of comfort and is filling enough for dinner with a big green salad.
This is not a recipe - it falls into my category of “concoction guidelines.” This dish works because all different shaped macaroni is used which allows the egg mixture to easily ooze into the crevices. And we recommend that you use those opened semi-full boxes of pasta that are sitting in your pantry. If you don’t then you’ll have to open a few and make this dish more than once!!
5-6 eggs
Grated Pecorino Romano
Mozzarella
Salt
Pepper
Cubed dry sausage (optional)
Milk (if necessary)
1-1.5 lbs of remnant macaroni - must be a mix of several shapes such as ziti, rotini, spaghetti, lasagna, elbow, shells etc.
Beat the eggs and mix with 1/4 - 1/2 cup of Pecorino Romano and fresh pepper. Set aside. Boil water and throw in about a pound - pound and a half of mixed pasta shapes. When al dente, drain water and return pasta to pot. Add the egg mixture and mozzarella. If it seems too stiff, add a little milk to loosen (this is really a “feel” call - it should seem more liquidy than stiff.) You may also decide you want to add more Pecorino Romano too! Add the dry sausage and pour into a lasagna pan.
Refrigerate over night so flavors meld.
Preheat oven to 350-375 degrees.
If the pan cannot go from fridge to oven, bring to room temp before putting in oven.
Generously sprinkle Pecorino Romano, salt and pepper on top before you place it in oven. Bake covered for about 45 minutes, then remove foil and allow top to become browned and crispy.
Let set, cut into squares and enjoy!!
My favorite are the crispy top and bottom - YUM!! I eat it piping hot, cold and reheated in the microwave.
Sunday February 14, 2010
Time Thief - Part II
I’ll admit it, in a pinch I make caramel apples with Kraft caramel candy!! But, I am somewhat of a purist and food snob and I take pride in using real ingredients and making things from scratch. So here is a winner that is so simple that uses 3 real ingredients.
The only caveat is you need a candy thermometer but it’s worth having in your cooking gear arsenal!!
6 - 8 small apples, unwaxed, cold and craft sticks
Line a baking sheet with parchment or wax paper.
Push the stick deep into each apple at the stem area.
Fill a large bowl 1/2 full with ice water and set aside.
In a medium, saucepan heat the cream and salt until tiny bubbles start forming where the cream touches the pan. Stir in the honey. Bring the mixture to a boil. Now reduce the heat to an active simmer and cook, stirring constantly with a wooden spoon, for about 15-20 minutes minutes or until the mixture reaches about 255-260 degrees on your candy thermometer.
To stop the caramel from cooking, set the bottom of the saucepan in the bowl of cold water. Stir until caramel begins to thicken up. Here is where there is a little bit of “art” - the caramel has to me thin enough to coat the apples but thick enough to stick. If the caramel thickens too much simply put the pot back over the burner for 10 seconds or so to heat it up a bit.
Tilt the sauce pan so all the caramel forms a pool on one side, then dunk and twirl each apple until it is thoroughly coated with caramel. Place each apple on the baking sheets and allow the caramel to cool and set. Enjoy!!
Page 12 of 14 pages ‹ First < 10 11 12 13 14 >

