Heirloom Meals: Savoring Yesterday's Traditions Today

Friday December 18, 2009

Carole’s Concoctions:
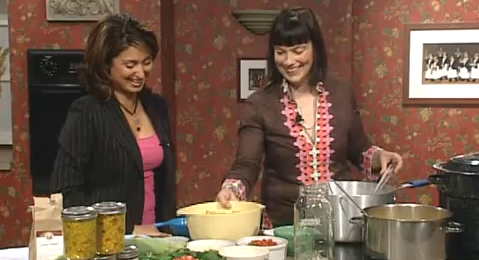
Recipes for Newschannel 13 (Albany NY) - Saturday Morning 12/19 - Hostess Gifts

Here are the recipes for the spiced nuts, struffoli and caramels that I am (have) packaging(ed) on TV tomorrow morning December 19th at 8.40 - tune in if you can.  I will be posting video tips later along with the segment clip as well.  Wish me luck!!  Good night for now!!


Struffoli
 
Growing up in a three generation household with my Italian grandparents was a gift.  My Christmas time memories are so vivid.  My grandmother set up a round folding table with a green wool skirt with a beautiful green and red embroidered linen topper where she displayed all her Christmas treats.  I would sneak in and “steal” a ball off her honey wreaths and pray she wouldn’t notice.  I’m sure she knew but she never let on....
 
3 cups flour
1 Tablespoon sugar
Zest of 1/2 lemon
Zest of 1/2 orange
Pinch of salt
4 eggs
1 tsp vanilla or grappa or limoncella
canola oil for deep frying (about 2 cups)
 
2 cups honey
1/2 cup sugar
1/3 cup water
 
Mix dry ingredients in a large bowl.  Make a well in the center and add eggs and vanilla.  Slowly incorporate using your fingers.  Gather into a ball and let rest for about 30 minutes at room temperature.  Heat oil in a medium saucepan over medium heat (to test temperature - toss small piece of dough - when it sizzles vigorously - it’s ready!!) Grab a golf ball sized ball of dough and roll it between your hands so it forms into a rope about 1/3” in diameter.  Then cut rope into 1/3” pieces.  Fry the balls in batches.  Place on paper towel to absorb excess oil.
 
Once the balls are done, begin making the honey syrup.  Heat the honey, sugar and water in a large saucepan over low heat until the sugar is dissolved then turn up the heat until the liquid boils and bubbls.  When the foam dies down and the mixture has darkened (all takes about 4 minutes +/-), take off the heat and add the fried balls.
 
Using a slotted spoon, remove honey balls and arrange on a lightly oiled piece of wax or parchment paper.  My grandmother used a glass to form the center of a wreath and put balls all around and then sprinkle with candied fruit or nuts.  She brought the struffoli wreaths to all her friends and relatives when they visited them during the holidays - a lovely tradition!!


Spicy Curried Walnuts 
 
These have been in my Mom’s and my stable of winners for years.  They make excellent bar treats, great hostess gifts and are fantastic in a salad.
 
1 lb walnut halves
1/2 cup sugar
3 1/2 tablespoons canola oil
1/2 teaspoon salt
1/4 teaspoon pepper
1/4 teaspoon cayenne
1/2 teaspoon coriander
1/2 teaspoon ground ginger
1/4 teaspoon ground cloves
1 1/2 teaspoons cumin
 
Preheat oven to 325 degrees.
 
First you need to blanch walnuts for about a minute in boiling water. Drain and toss well with sugar and oil. Let stand for about 10 minutes.
 
Prepare a baking sheet by lining with parchment paper. Spread walnuts in a single layer and place in the middle of the oven. Check and turn the walnuts every 7-10 minutes until golden. I find the process is about 25 minutes but be careful - one extra minute can turn your golden nuts black. Remove golden nuts and put in a large bowl. Mix all spices and then toss with the warm nuts. Spread nuts in a single layer to cool. Once cool, store in a sealed container and Enjoy!!


Christmas Caramels
 
I am inspired this season to be a mad baker and maker of yummy edible gifts. I've got my plan and I will share with you as I prepare each goodie. But for whatever reason, I decided to go off my list when I was paging through December's Country Living Magazine and make Butter and Cream Caramels and yes they are an indulgence extraordinaire. I'll need to go for a good long jog to keep these off my hips...but what are the holidays if not for eating lots of amazing food!! Here's the recipe with my comments and tweaks, of course!!
 
1 cup sugar
1 cup heavy cream
1/2 cup unsalted butter
1 cup light corn syrup
1 1/2 tsp vanilla extract
canola oil for greasing
candy thermometer
 
Line an 8 x 8 pan with foil and brush with canola oil.
 
In a medium saucepan over high heat cook the sugar without stirring until it begins to melt and boil at which time you can stir slowly with a metal spoon until melted (about 1 minute). Remove from heat and add cream. The sugar will harden almost immediately. Then add in the butter and corn syrup. Attach candy thermometer and return saucepan to stove over low heat, stirring occasionally for around 30 minutes until mixture liquefies. (This is a challenging spot as it seems as though it will never happen and then it just does.) Once that happens, turn the heat up and cook caramel mixture until the thermometer reaches 238 degrees F.
Remove from stove and stir in the vanilla. Then pour into prepared 8 x8 pan. Cool caramel for at least 30 minutes, lift from pan, remove foil and place on an oiled cutting board. Using an oiled knife, cut caramel into 1" squares. (I found it worked best when the caramel had sat for a while on the cutting board and when I ran my knife under hot water and then oiled it - the caramel did not stick to the knife.)
Wrap the individual pieces in 4 x 4 wrappers and then package them in a larger plastic bag with pretty ribbon.

Sunday December 13, 2009

Carole’s Concoctions:
Christmas Caramels

I am inspired this season to be a mad baker and maker of yummy edible gifts. I've got my plan and I will share with you as I prepare each goodie. But for whatever reason, I decided to go off my list when I was paging through December's Country Living Magazine and make Butter and Cream Caramels and yes they are an indulgence extraordinaire. I'll need to go for a good long jog to keep these off my hips...but what are the holidays if not for eating lots of amazing food!! Here's the recipe with my comments and tweaks, of course!!

 
1 cup sugar
1 cup heavy cream
1/2 cup unsalted butter
1 cup light corn syrup
1 1/2 tsp vanilla extract
canola oil for greasing
candy thermometer
 
Line an 8 x 8 pan with foil and brush with canola oil.
 
In a medium saucepan over high heat cook the sugar without stirring until it begins to melt and boil at which time you can stir slowly with a metal spoon until melted (about 1 minute). Remove from heat and add cream. The sugar will harden almost immediately. Then add in the butter and corn syrup. Attach candy thermometer and return saucepan to stove over low heat, stirring occasionally for around 30 minutes until mixture liquefies. (This is a challenging spot as it seems as though it will never happen and then it just does.) Once that happens, turn the heat up and cook caramel mixture until the thermometer reaches 238 degrees F.
Remove from stove and stir in the vanilla. Then pour into prepared 8 x8 pan. Cool caramel for at least 30 minutes, lift from pan, remove foil and place on an oiled cutting board. Using an oiled knife, cut caramel into 1" squares. (I found it worked best when the caramel had sat for a while on the cutting board and when I ran my knife under hot water and then oiled it - the caramel did not stick to the knife.)
Wrap the individual pieces in 4 x 4 wrappers and then package them in a larger plastic bag with pretty ribbon.
 
I gave one to Jim to test and he's already addicted as I caught him taking a couple for "dessert."

Monday December 07, 2009

Carole’s Concoctions:
Baking with Mom - Nutella Heaven Part 1


I have always envied my Mom because she baked whenever she was stressed, worried, or frustrated. And the gorgeous and delicious goodies she produced were and still are phenomenal!! My Mom is a cookbook collector; she reads them as if they were page-turning thrillers. The by-product of such a habit is a stack of recipes that she must "try." And boy does she "try" them - she pretty much produces a picture perfect attempt every time. Some she discards as, "it sounded better than it tastes." And some become part of the recipe war chest. Her arsenal of winners. And lucky for me, I am related to a veritable test kitchen. I can just assume one of her tested recipes and whip it up knowing that it will be a success.
 
One of these recipes is a Nutella Pound Cake. Exactly, I know what you are thinking - could this really be that good. The answer - it is show stopping delicious!
 
Mom and I got together on Sunday to bake up some cakes (date nut spice and Nutella cakes) for client and hostess gifts.
 
Here's the recipe for Nutella Heaven as I have renamed it:
 
4 eggs at room temperature
2 teaspoons vanilla
1 1/2 cups flour
3/4 teaspoon baking powder
1/4 teaspoon salt
1 1/4 cup sugar
2 stick butter, softened
1 13 ounce jar of Nutella
 
Preheat oven to 325 degrees.
Grease and flour a 9 x 5 loaf pan. Lightly beat eggs with vanilla in a small bowl. Whisk the flour, baking powder and salt in a medium bowl. Beat butter and sugar with a hand mixer in a large bowl until fluffy. At low-to-medium speed gradually beat in egg mixture until fully incorporated. Add the flour mixture in batches, beating at low speed. Spread 1/3 of batter in prepared loaf pan, then spread 1/2 of Nutella on top. Repeat with another 1/3 of batter and the remaining Nutella, topping with the last 1/3 of batter. Lightly swirl Nutella into batter but be careful not to over mix. Bake cake 1 hour and 15 minutes. Let cake cool in pan for 15 minutes. Then remove from pan and let cool for another 2 hours on a wire rack.
And then ENJOY!!!!

Thursday December 03, 2009

Ms Murky Mondays:
Time Thief - How did 2+ months go by?

Ever wonder where the time goes? My mind is still in September but my body is in early December. Somehow I managed to operate at warp speed, get new clients, do another TV segment on WNYT - Newschannel 13 out of Albany, harvest our first meat chickens, attend my high school reunion, host the family for Thanksgiving, begin a jogging program along with a core strengthening pilates program...are you tired yet?


So how do I blog on a regular basis - how do I catch you up on all the yummy meals I have made in the last 2 months? Well I'll start with sharing my TV segment - Heirloom Trick or Treats.


Heirloom Caramel Apples
I’ll admit it, in a pinch I make caramel apples with Kraft caramel candy!! But, I am somewhat of a purist and food snob and I take pride in using real ingredients and making things from scratch. So here is a winner that is so simple that uses 3 real ingredients.
The only caveat is you need a candy thermometer but it’s worth having in your cooking gear arsenal!!
6 - 8 small apples, unwaxed, cold and craft sticks
1 cup heavy cream
1/2 teaspoon sea salt
1 cup honey
Line a baking sheet with parchment or wax paper.
Push the stick deep into each apple at the stem area.
Fill a large bowl 1/2 full with ice water and set aside.
In a medium, saucepan heat the cream and salt until tiny bubbles start forming where the cream touches the pan. Stir in the honey. Bring the mixture to a boil. Now reduce the heat to an active simmer and cook, stirring constantly with a wooden spoon, for about 15-20 minutes minutes or until the mixture reaches about 255-260 degrees on your candy thermometer.
To stop the caramel from cooking, set the bottom of the saucepan in the bowl of cold water. Stir until caramel begins to thicken up. Here is where there is a little bit of “art” - the caramel has to me thin enough to coat the apples but thick enough to stick. If the caramel thickens too much simply put the pot back over the burner for 10 seconds or so to heat it up a bit.
Tilt the sauce pan so all the caramel forms a pool on one side, then dunk and twirl each apple until it is thoroughly coated with caramel. Place each apple on the baking sheets and allow the caramel to cool and set. Enjoy!!
 
 
Caramel Apples using caramel candies
 
5 medium apples, washed, well dried
1 bag (11 oz.) KRAFT Caramel Bits
2 Tbsp. water
 
Insert one wooden pop stick (from bag of caramels) into stem end of each apple. Cover a baking sheet with waxed paper; spray with cooking spray. Set aside.
 
Place caramel bits in medium saucepan. Add water; cook on medium-low heat 3 min. or until caramel bits are completely melted, stirring constantly.
 
Dip apples into melted caramel until evenly coated, spooning caramel over apples if necessary. Allow excess caramel to drip off. Scrape bottoms of apples; place on prepared baking sheet. Refrigerate at least 1 hour. Remove from refrigerator 15 min. before serving. Store any leftover apples in refrigerator.
 
Caramel apples can be rolled in a variety of coatings for a sweet treat that is perfect for gift-giving or for serving on a special occasion, i.e: nuts, mini chocolate chips,
drizzled chocolate, drizzled white chocolate.


Cobweb Cupcake Icing
 
2 egg whites
21/2 to 3 cups confectioners' sugar
1 teaspoon pure vanilla extract
2 tablespoons fresh orange juice
Black or dark brown food coloring
Make whatever kind of cupcakes you like - from scratch or mix.
To make the icing, place the egg whites in a bowl. Using an electric mixer set on high speed, beat until soft peaks form. Add the confectioners' sugar, vanilla, and orange juice and continue to beat until thick and shiny. If too thick, add more orange juice. If too thin, add more confectioners' sugar.
Transfer 1/3 of the icing to a small bowl and color with black or dark brown food coloring. Spoon this dark icing into a pastry bag fitted with a tip, or pour it into a plastic squeeze bottle.
Now, ice the cupcakes and make the cobwebs: Spoon the white icing into the center of the cupcake and spread with a small spatula or butter knife. Starting at the center of a cupcake, pipe a spiral of the dark icing from the center to the outer edge. Then, drag a sharp knife point from the center of the spiral to the edge of the cupcake. Wipe the knife clean, move about a 1/2-inch to the left or right and drag the knife in the opposite direction from the outer edge to the middle of the cupcake. Continue in this way until you have worked your way around the cupcake and formed the cobweb. Repeat with the remaining cupcakes.


Chocolate Covered Pretzels
 
2 bags chocolate chips (dark or milk chocolate)
1 bag pretzels logs
Chopped nuts, for garnish, optional
Colored nonpareils, for garnish, optional
Sprinkles, for garnish, optional
Coconut, for garnish, optional
Melt chocolate in double boiler over medium heat on stove top. Using tongs, or your fingers, quickly dip pretzels in chocolate allowing the excess to run off. Place dipped pretzels on waxed paper lined cookie sheets. Sprinkle with chopped nuts, colored sugars or other toppings. Allow to harden. You may need to refrigerate for a while to help this along. Once hardened, remove from sheets and store in a cool location, with waxed paper between layers.
Tip: Package pretzels in clear cellophane bags or in vase for festive gift giving!
[youtube=http://www.youtube.com/watch?v=tiwbZb6_phk]

Sunday September 20, 2009

Ms Murky Mondays:
Canning Workshop - Many Hands Make for Light Work


In the photo from left to right: Me, Jim Finnerty, Judith Lerner, Jacque Metsma, Carol Way, Kevin Charlton, Doreen, Sandy, DonaSenecal, Margot and Serene Mastrianni.

 
My grandmother's wisdom was evident on Thursday night (the 17th) when I hosted a canning workshop for Berkshire Grown's "Preserving the Bounty" month when 10 people diligently chopped, diced or minced 20 lbs of tomatoes, 5 lbs of onions, 10 green peppers, 20 jalapenos, 20 cloves of garlic and 2 dozen ears of corn in 30-40 minutes. If I had taken on the task by myself, which I frequently do, it would have been hours.
Anyhow, what fun we had! And the result was 40 pints of corn and black bean salsa. Here's the recipe for about 1/5 of what made:
 

Corn and Black Bean Salsa


4 lbs tomatoes, chopped and drained

2 1/2 cups onions, chopped

1 1/2 cups green peppers

1 cup jalapeno pepper, chopped

6 garlic cloves, minced

1 teaspoon cumin

1 teaspoon black pepper

1/8 cup canning salt

1/3 cup vinegar

1 (15 ounce) tomato sauce

1 (12 ounce) tomato paste

1 (15 ounce) black beans, drained and rinsed

2 cups fresh corn kernels


Equipment: boiling water canner,canning jars, canning funnel, rubber spatula, jar lifter and/or tongs


First, prepare your jars as follows:


Place cans on rack of boiling water canner, add water until the pint jars are about 2/3rds full. Cover and bring to a simmer. This process kills any bacteria. In a small saucepan, place the lids - the flat, round piece, cover and bring to a simmer. The screw bands do not need to sterilized.


Then, start your vegetables:


In a large saucepan, combine all ingredients and bring to a boil, stirring occassinally for about 5 minutes.


Now you are ready to start canning your salsa:


One jar at a time, remove from canner, pouring hot water back into canner, place jar on flat heat-resistant surface. Ladle salsa into jar leaving about a half inch of headspace, wipe the rim and threads with a paper towel. ( This is important to make sure vacuum seal can occur). Lift a hot lid with your tongs and place on jar and then screw the lid with your fingertips until tight. Place back in canner with tongs. Repeat until done.


Cover all jars with additional water by an inch or so. Cover canner and bring to a boil. The boiling must be continuous and rapid for 15 minutes. Remove lid, let sit for about 5 minutes or so. Remove jars without tilting, place jars on a towel in a draft-free spot and allow to cool for 24 hours. Store in a cool dark place for up to a year.


This recipe will yield about 6 pint jars. Enjoy!!

Tuesday September 15, 2009

Ms Murky Mondays:
Here’s my Corn Relish News Clip

I had a ton of fun preparing and then being on a news segment on Channel 13 in Albany, NY.
What was quite interesting was that when I arrived in the studio at 7.30 in the morning lugging all my props - pots, ramekins, all stages of corn relish, I was actually expecting to get some guidance. They pointed me to the studio kitchen, and told me to go ahead and get set up.
So I diligently got everything staged, styled and ready. I had marked each of my ramekins with masking tape and the amount of the ingredients so if I got "stage fright" I would be able to sail through without a hitch. But I kept waiting for the producer or someone to come over and tell me what they would like to cover, how much time we had etc. So I stood there with all my nervous energy, waiting and wondering when it would be my turn.
And then, someone came over and gave me the microphone. I thought, "Ok, next someone will give me a little coaching." Then the bright lights were pointed at me, the camera rolled over and there was a commercial break. The news anchor came over, asked me how to pronounce my name and a little about Preserving the Bounty and 4,3,2,1..."Welcome back to....we've got Carole Murko in the studio with us today - tell us what do you plan on showing us"...and I was off ...winging it, having fun, answering questions, trying to do a food demo... and in what felt like 10 seconds it was over...."but wait, I'm not done!" I am thinking....
So, click the photo to watch the clip - it was actually more like 4 minutes, not 10 seconds and I loved every minute of it. Hope they ask me back to do more!!

Page 86 of 88 pages ‹ First  < 84 85 86 87 88 >